It’s easy to use PayPal with NS Basic/App Studio. You can collect the money as payments or a donations. PayPal is available in many countries. It’s much easier to set up and use than a credit card.
First, set yourself up as a PayPal Merchant. Assuming you already have a PayPal account, go to the Merchant Services tab on the main screen. On the left, you will see a tab called “Website Payments Standard”. Click on that and follow the instructions.
Once you are set up as a merchant, you will need to set up your product. The easiest way to do that is on the Merchant Services page: Choose the “Buy Now button” option. Enter a number of fields, including item name, item ID (a reference number for your own use), price, currency (21 choices!), shipping and tax info. Once complete, click on ‘Create Button’.
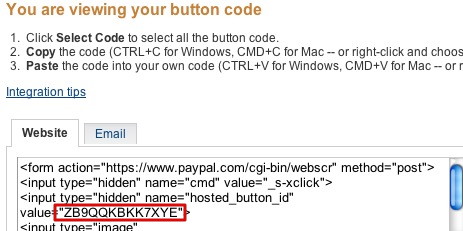
It will go to a new page, showing the code for the button. You’re interested in the string just after “value=”. In this case, it is “UEQCPME2W9Q8W”. Copy this number down – you will need to enter it in the IDE:
In your project, add the PayPal button like any other and position on your form. It will have the following properties:

Put the value from the PayPal screen into ‘hostedButtonID’. For TransactionType, select ‘Buy’ or “Donate’. One of the following will appear on your form:

That’s all you have to do. When your app is running, if the user clicks on the PayPal button, a new browser window will open to the PayPal page, with your product showing. All they have to do is authorize the transaction and the money will show up in your PayPal account.

If you’re running as a web app, you do not have to pay 30% to Apple. Please be careful of local tax laws and restrictions.