Using serverStorage to save your data

ServerStorage is an easy new way to save data in your AppStudio App. It works just like localStorage, but instead of saving the data locally on your device, it saves to the server.

This opens up many new possibilities: Companies could upload and download data, teachers could publish information for students, games could share scores or moves. It could even be used as a backup in the cloud.
Continue reading “Using serverStorage to save your data”

Videos!

We now have a set of YouTube videos available. They’re short – just a minute or two each – but help with how to get started with AppStudio.

They are:

  • A Short Tour of AppStudio
  • Your first AppStudio App: Hello World!
  • Run your AppStudio App on iOS
  • Run your AppStudio App on Android
  • Use PhoneGap to make an AppStudio App native

English: https://www.youtube.com/channel/UC3NpfXo8K7xoYZENHvhShYw

Arabic: https://www.youtube.com/channel/UC5g_DTUUJnTthlF6-5pPR7Q

Parameters: an easier way to make SQLite commands

Ever had to code a messy statement like this?

    sqlList[j]="INSERT INTO customerData (name, age, sales) VALUES _
        ( " & "'cust" & j & "', " & j & ", " & j*10 & ");"

Here’s a more elegant want to do the same thing. Load your values into an array, then put a question mark in your query string where you want them to be substituted:

    args=[cust, j, j*10]
    sqlList[j]=["INSERT INTO customerData (name, age, sales) VALUES _
        (?,?,?);", args]

Notice that we also had to put the query string into an array, with the first element being the query string and the second our array of arguments.

(This is only for SQLite strings. If you would like to do something similar to your other strings, check out the Format function.)

Using the NSBApp Debugger

The NSBApp Debugger (AppStudio 4.2.2+) is based in the Weinre (“WEb INspector REmote”) app. It looks like a subset of the Chrome Debugger. That’s no surprise: both are based on the same Web Inspector software. This debugger does not have the ability to view code or set checkpoints, but otherwise is quite functional.

It’s a great way to debug your app when it running on an actual device.

Use it in the following cases:
Continue reading “Using the NSBApp Debugger”

Advanced control of the Camera using PhoneGap

(Guest post from Mike Burgher – thanks!)

I’ll share my experience using the Android camera; hope this doesn’t cause confusion. I wrote an NSBasic app that uses the camera to do motion detection on the area. It does time-lapse, auto-shoot the camera, and compares portions of the images over time. You use it, for example, if you are in a sketchy hotel room and you want some peace of mind. While you sleep, it will detect if the door starts to open, and alarms loudly and summons help.

It’s all NSBasic except the “getpicture” camera operation, which is a custom PhoneGap plugin. I know of no way to do this whole thing from JavaScript. The Android camera API sequence is non-trivial, but there is good documentation and code examples.

In a plugin, it’s fairly easy to select which camera, set the parameters, shoot the picture when the camera is ready, and save it.

The camera preview is more of an issue. The Android API sequence requires you to display a preview on the screen before the camera is ready to take a picture. For many applications, you don’t want to see that preview; you want to see your app. There are several approaches to hiding that preview, from making it ultra small (1px by 1px) to making it transparent on >= Android 4.0. But there is no single solution that works on all Android cameras. And there are various undocumented limitations on cameras, dictated by the manufacturer.

And it’s hard to debug a camera app! Things will work on the device, that won’t work in the Android emulator, and vice versa.

I started with an existing custom PhoneGap plugin called Foreground Camera, who’s purpose was to keep your app from going to the background and getting killed off by Android when you called the standard “getpicture”. It was modified to select the camera, hide the preview, and take the picture without user intervention.

Unfortunately, I’ve been living in an ancient PhoneGap 2.5 world for a long time. I suddenly have to bring all my stuff up to the current PhoneGap level. But I’d be happy to share my mods to this plugin. It’s not 100% stable yet, and I’d welcome any improvements.

— Mike
PhoneGap 2.9 and older is deprecated

PhoneGap announced today that they will deprecate PhoneGap 2.9 and older on October 15, 2014. Phone 3.0 and later are supported: the current version (as of the date of this post) is 3.6.3.

In most cases, the changes will not be major. Remember to go into your Project Properties and edit ‘PhoneGap config.xml’. It will have a line like this – edit it to use Version 3.6.3 (current as of the date of this post).

  "<preference name=\"phonegap-version\" value=\"3.6.3\" />", 

You can also delete the line entirely. In this case, PhoneGap Build will always use the latest version of PhoneGap.

More Twitter Tricks!

You may have seen the Twitter sample in Sample Folder 7: it shows how to use the Twitter control to add some basic Twitter functionality into your app.

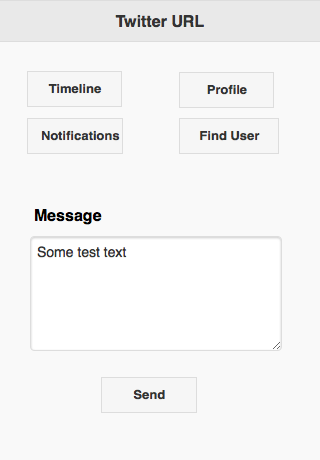
You can add more functionality by controlling the Twitter app from your AppStudio program. To do this, you’ll need to have the Twitter app installed and be logged into it. Most Twitter users will not have to do anything extra.

Here’s what the sample app look like:

Screen Shot 2014-08-18 at 4.29.19 PM

Continue reading “More Twitter Tricks!”

Sending a message to WhatsApp

WhatsApp is one of the hottest new apps this year. It lets you send messages to other WhatApp users via the net. It has over 500 million active users, with 700 million messages sent each day.

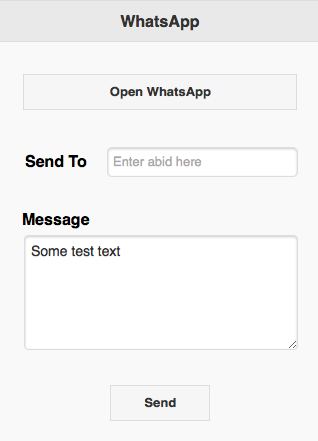
WhatsApp has an API, so you can hook it into your AppStudio app. It has two functions: open the WhatsApp app from your AppStudio App, and send a message to WhatsApp.

Here’s how our test app looks:
Screen Shot 2014-08-14 at 9.39.13 AM
Continue reading “Sending a message to WhatsApp”

Using Pushwoosh to do Notifications

The Pushwoosh API lets you send notifications from your computer to your app running on the device. While your app is running, if a notification is received, a function in your app will be called with the contents of the notification. It can then take whatever action needed based on the incoming data.

Notifications are a way to send and receive messages from your device. They have the ability to be broadcast to large numbers of devices. For Android, Google Cloud Messaging is used. For iOS, it uses the Apple Push Notification Service.
Continue reading “Using Pushwoosh to do Notifications”